Introduction
I recently started a blog. This is my very first post, in fact.
When setting up my blog, I wanted to have an email address for people to contact me, but I didn’t want to publish my personal email. Not that my email is a secret or anything, but I’ve recently found the zen of a clean inbox and the prospect of (more) spam isn’t terribly appealing.
I use Cloudflare for a lot of my online services and manage most of my domains through them, so naturally I looked into their offerings first for something that might fit the bill. I found Cloudflare’s Email Routing service, which looked the part and, as it goes, was quick and easy to set up. It does exactly what it says on the tin.
Preamble over, the rest of this post will walk you through how to set it up.
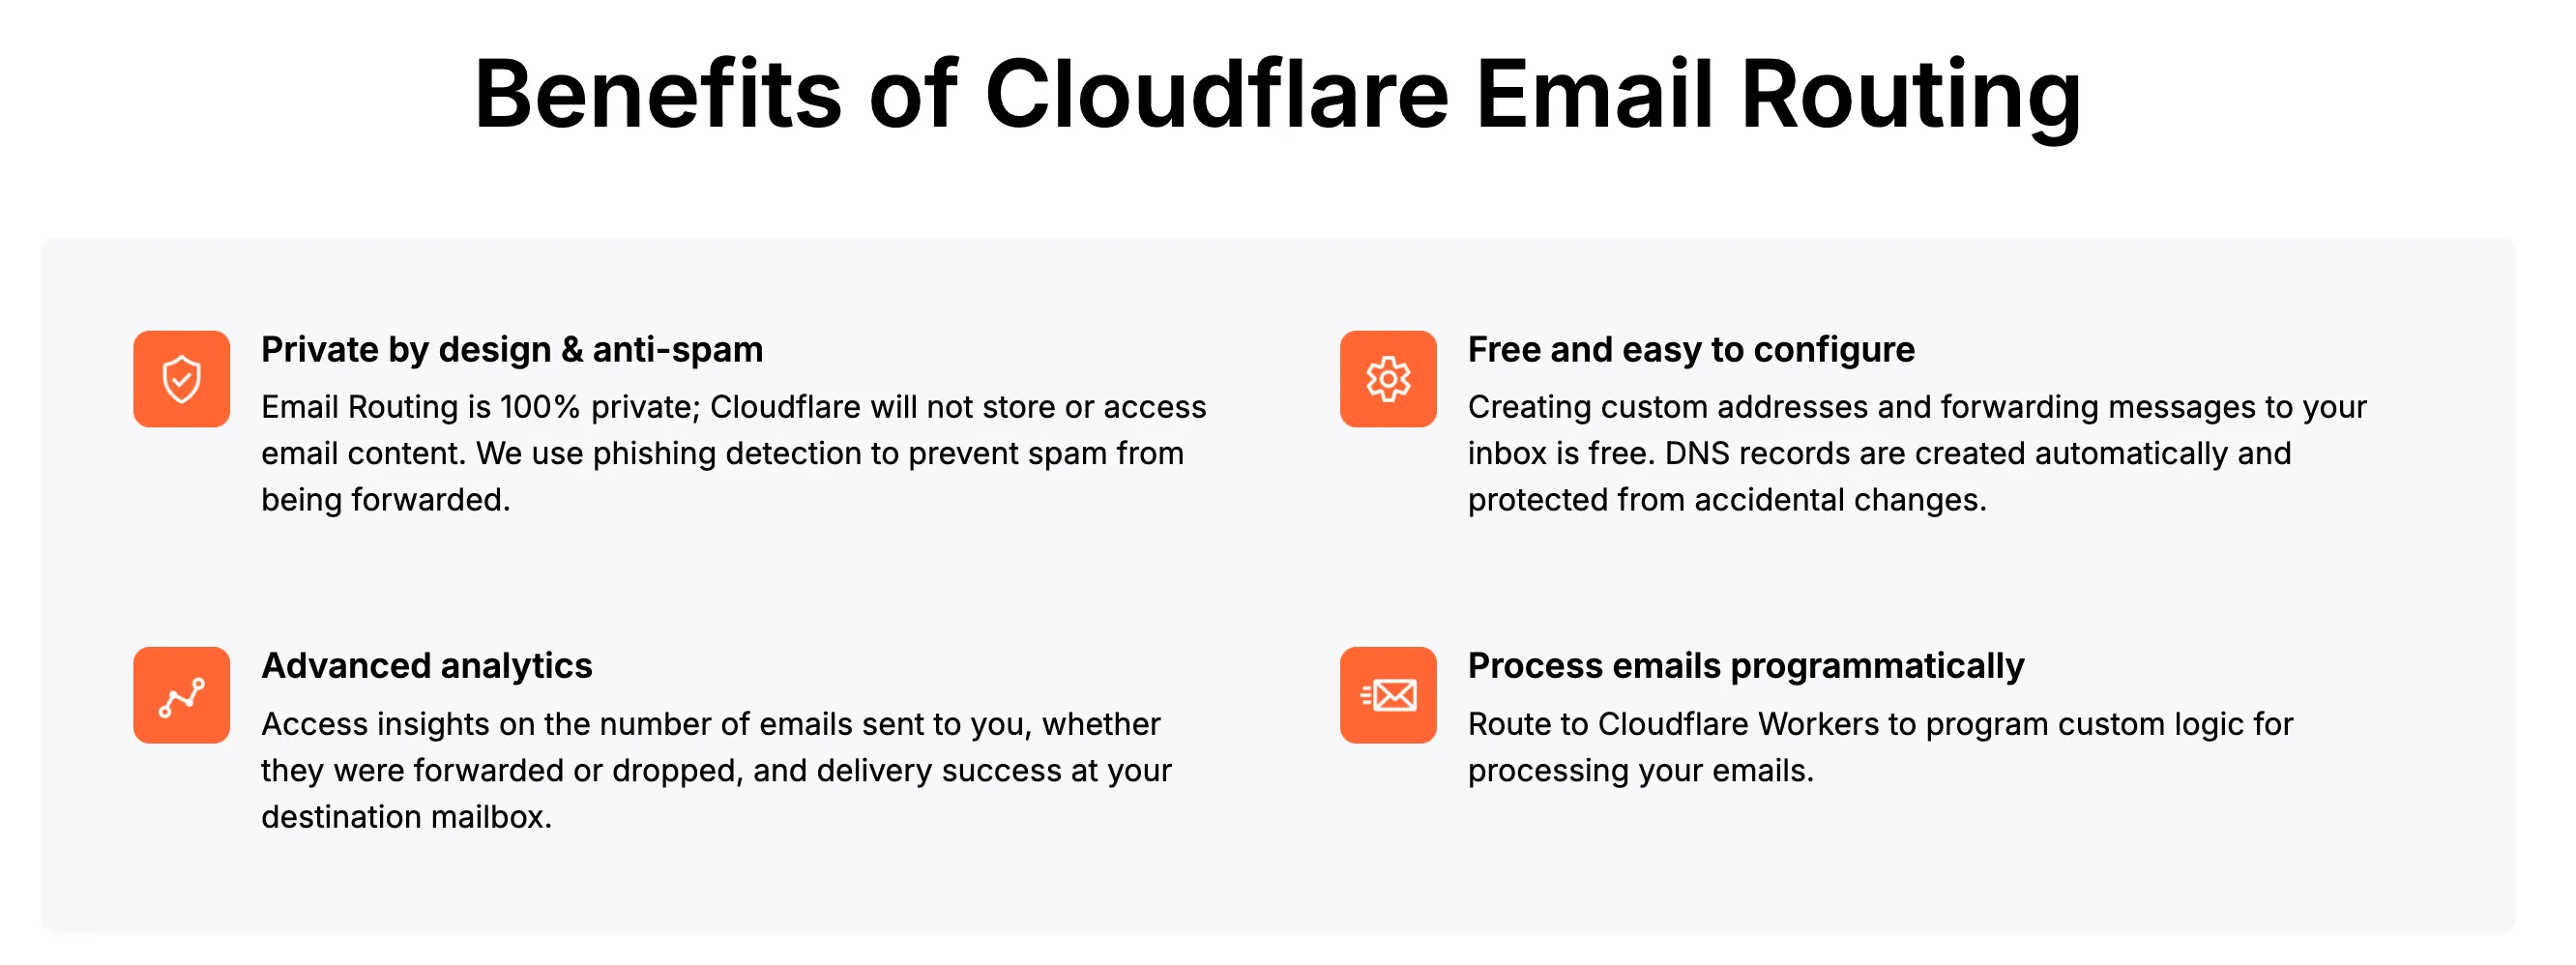
What is Cloudflare Email Routing, anyway?
In a nutshell, it’s a service that allows you to create an email address associated with your Cloudflare-managed domain that forwards email to another address while keeping the recipient’s email private.
Setting up Cloudflare Email Routing
If, like me, you’re already managing your domain in Cloudflare, it’s a simple process:
- Choose the zone you want to add an email address to
- Configure DNS
- Set up your destination email address
- Create a custom email address
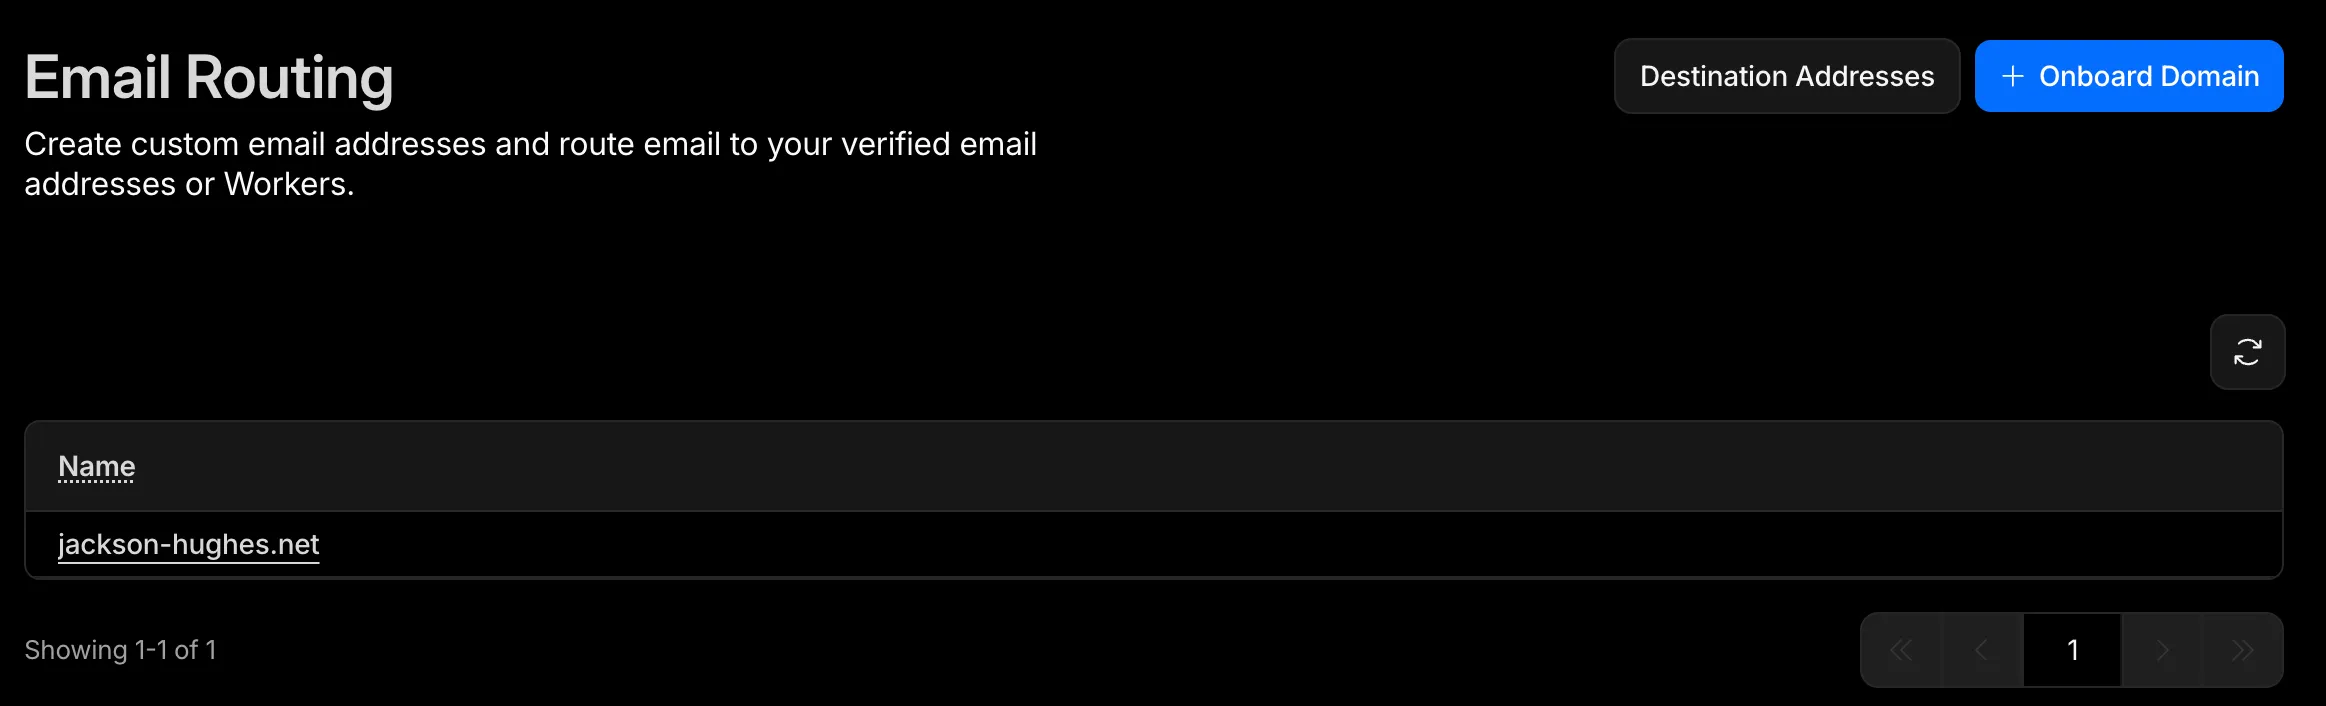
First, log into the Cloudflare dashboard and select your domain.
Select Email Routing, under Email, on the left-hand menu.

Press the blue button.
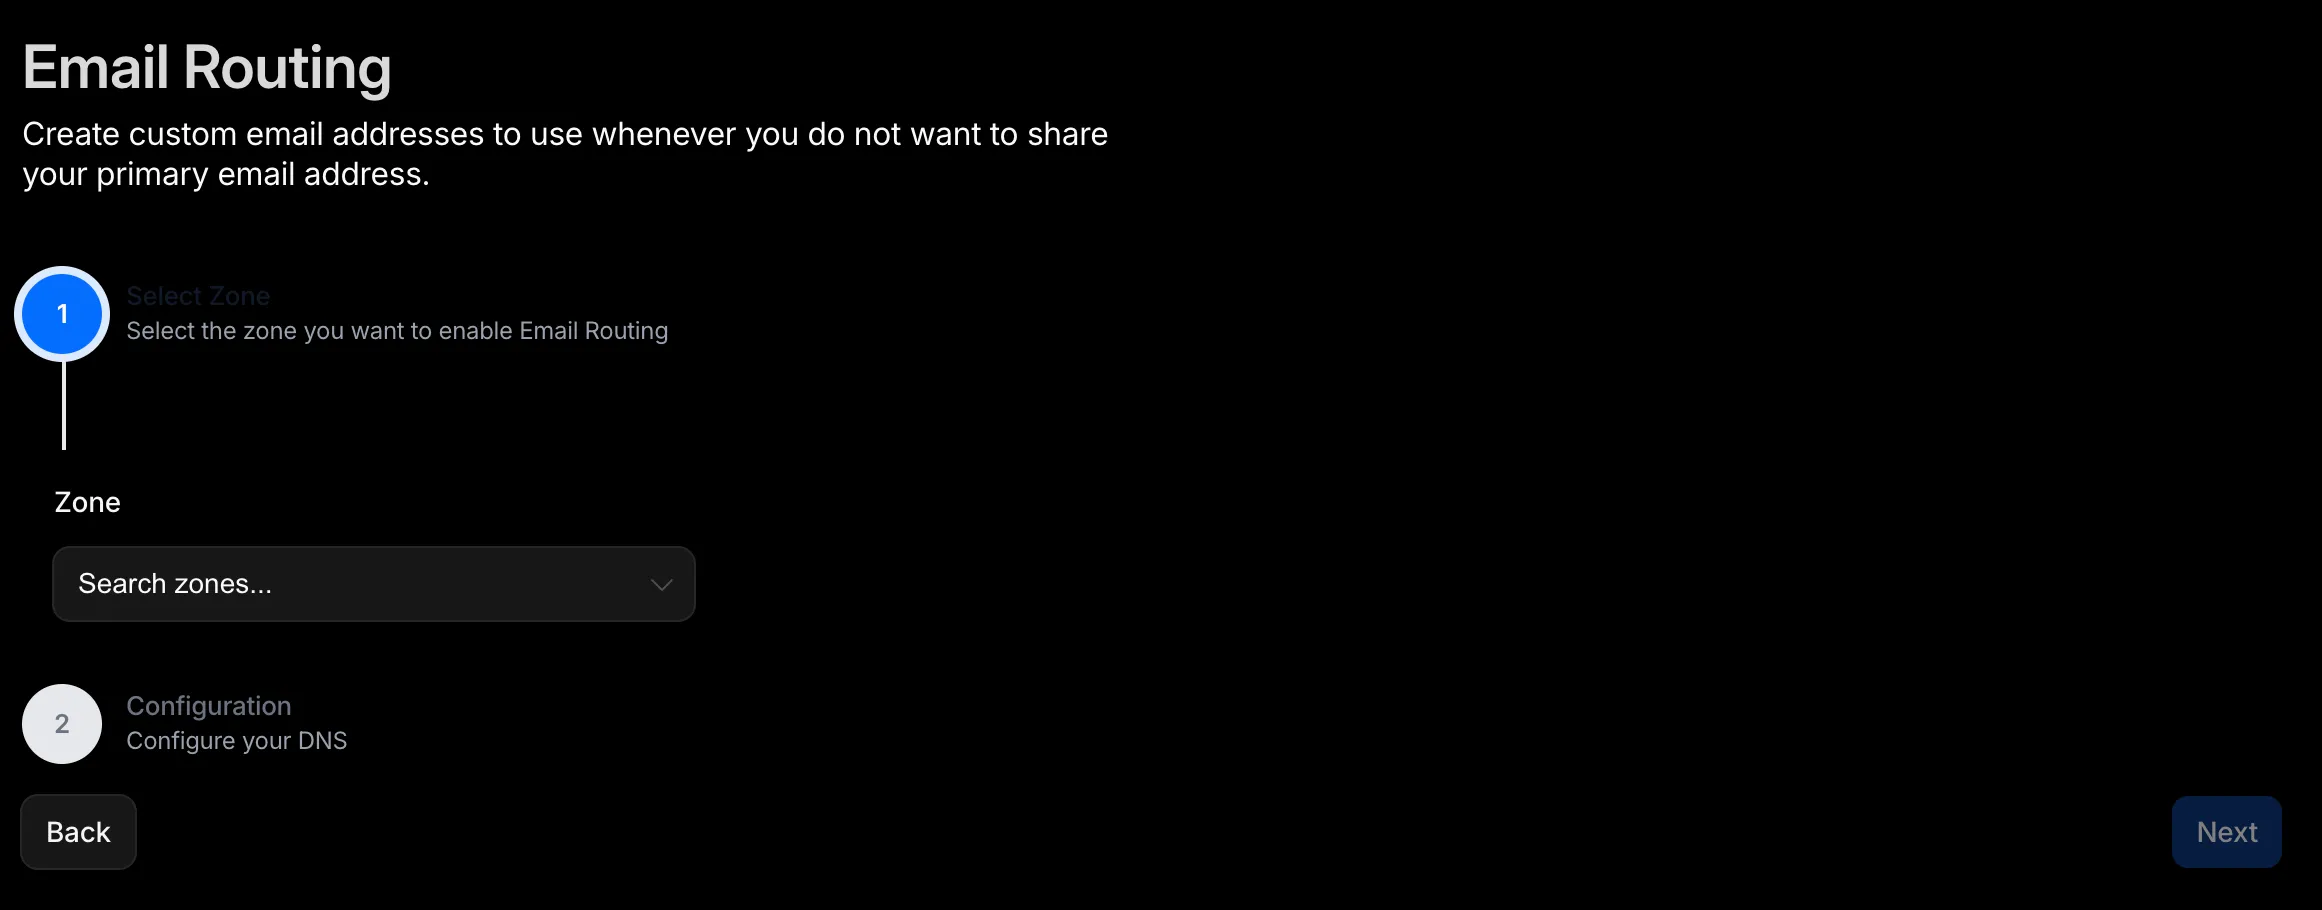
Select your zone to enable email routing from the dropdown menu.
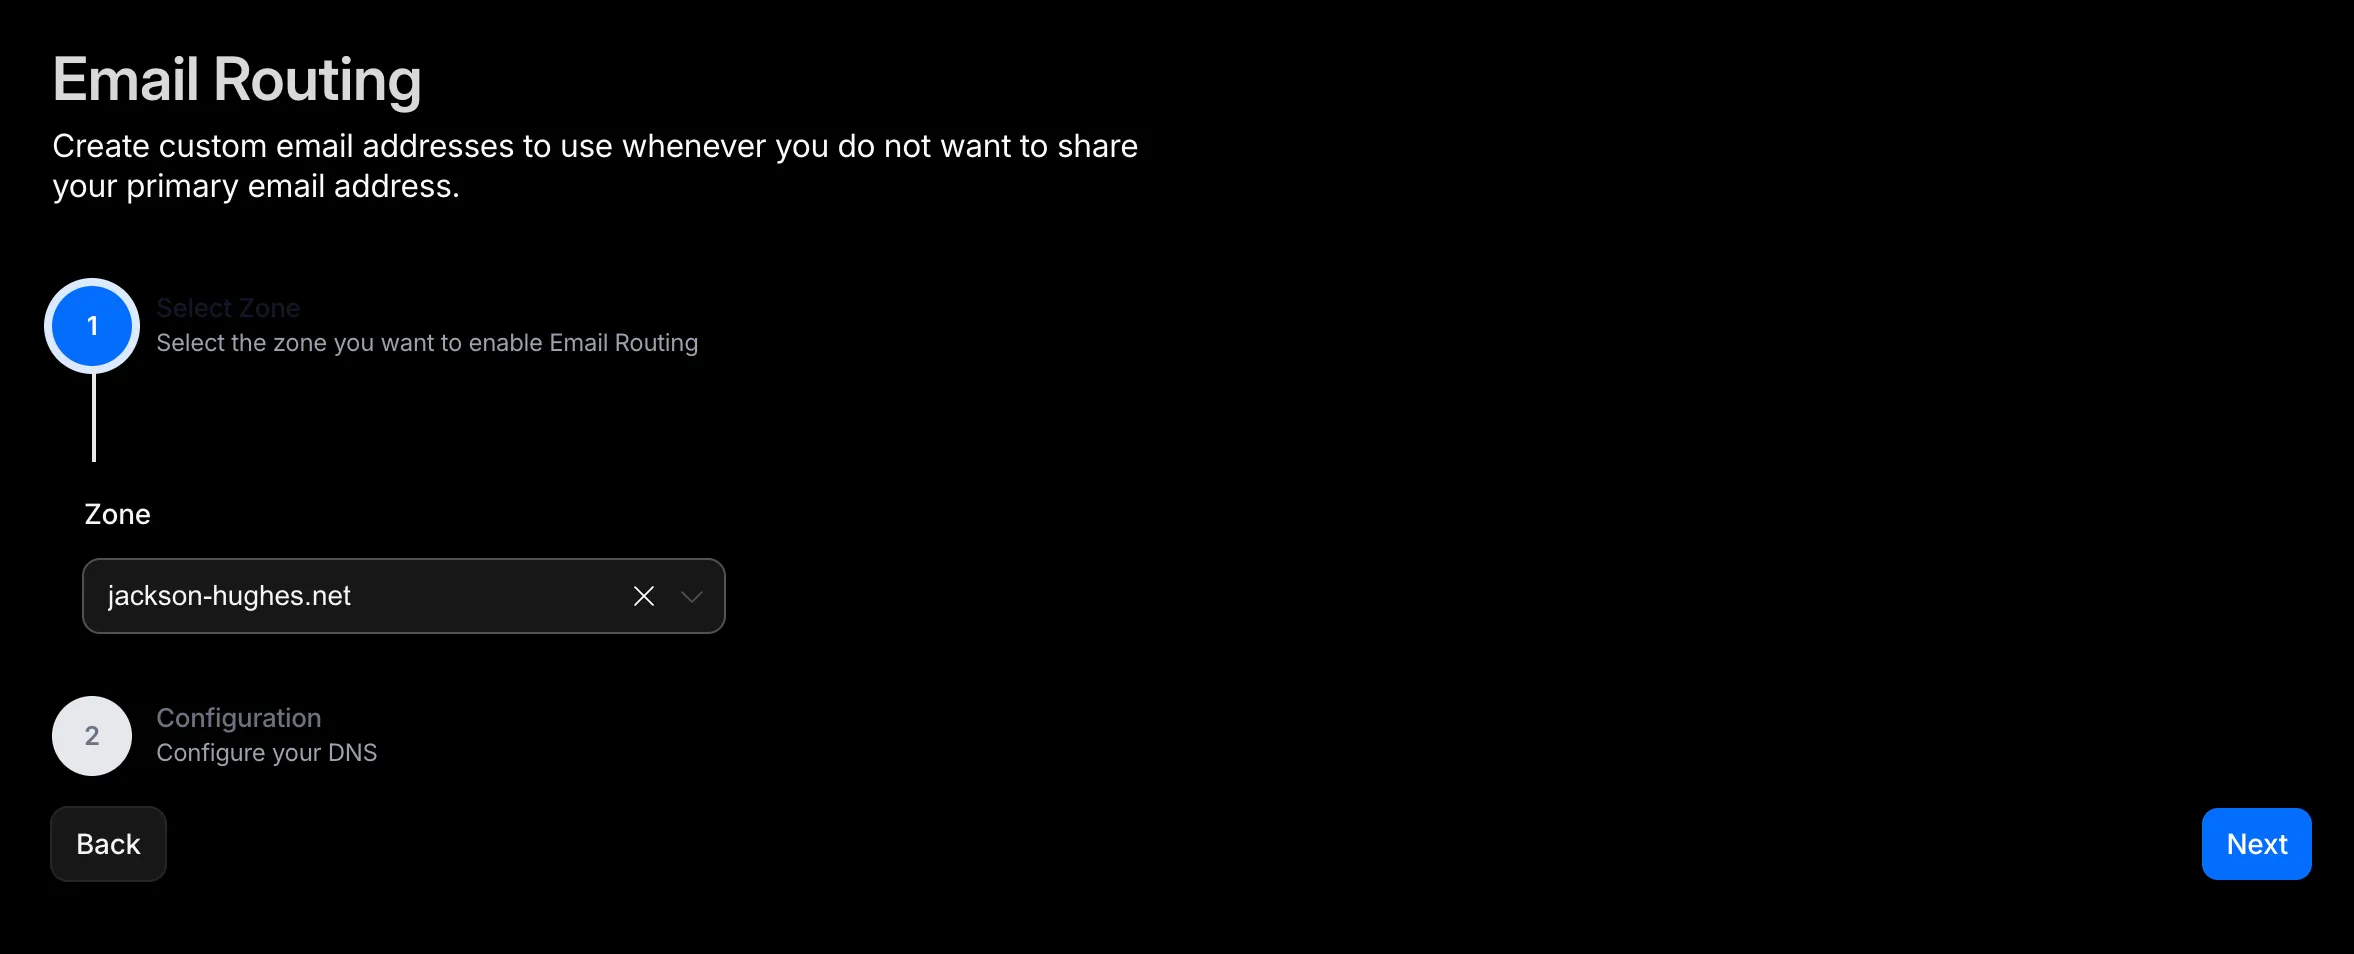
Hit next.
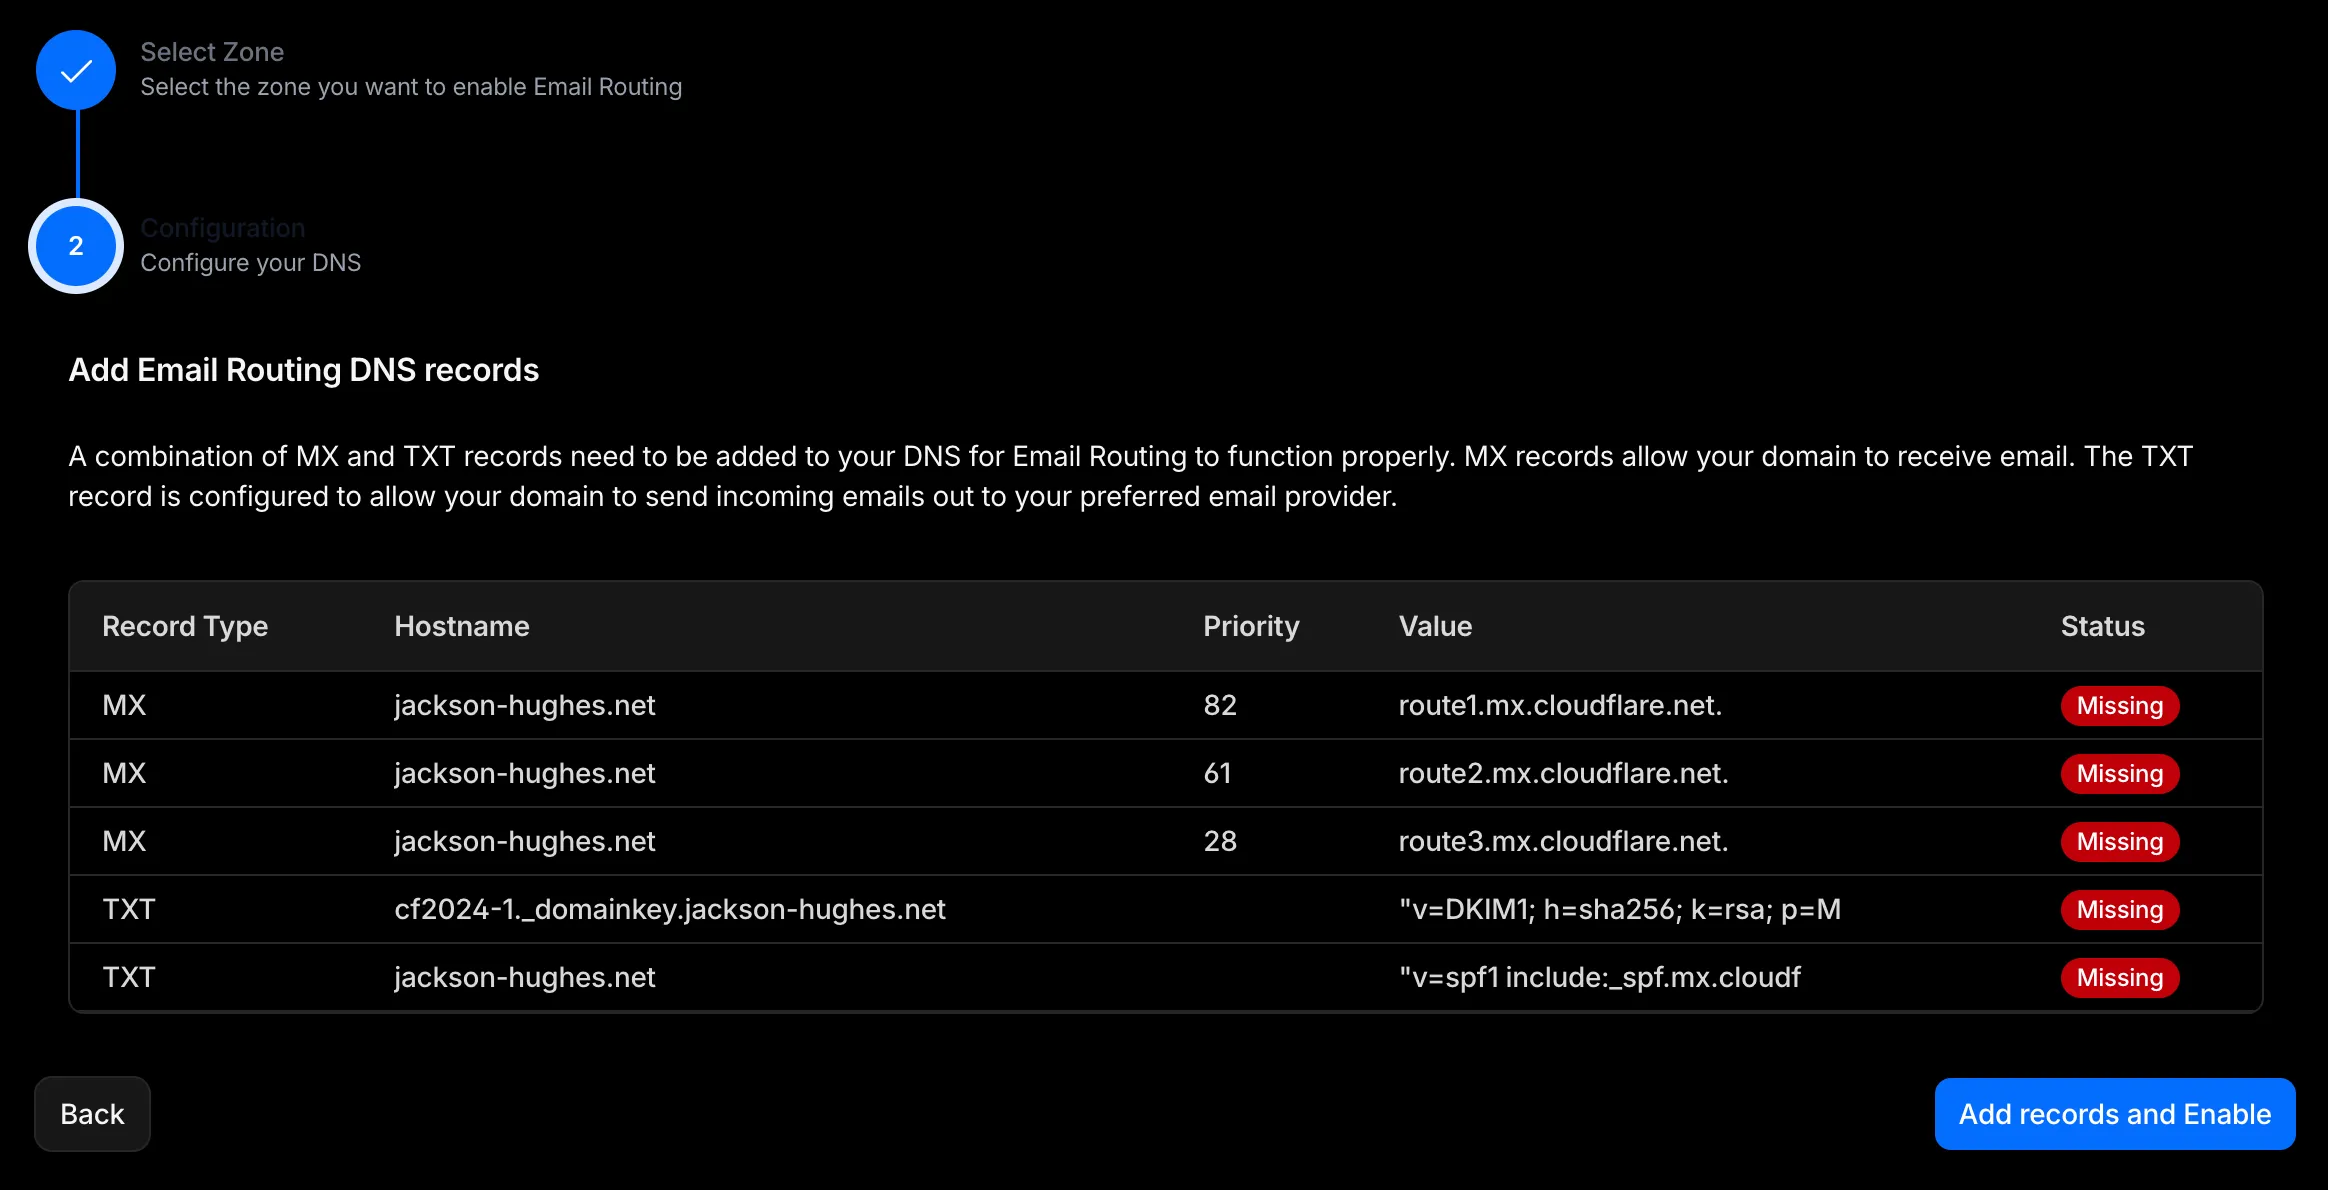
I’ve never set up anything related to email for the jackson-hughes.net domain before, so I have no DNS records or concerns about possible conflicts.
Helpfully, it’s a one-button operation to set up the necessary DNS records.
After pressing Add records and Enable, you’ll get a reassuring email routing enabled message before being returned to the Email Routing page.
Click on your domain and head to Destination addresses.
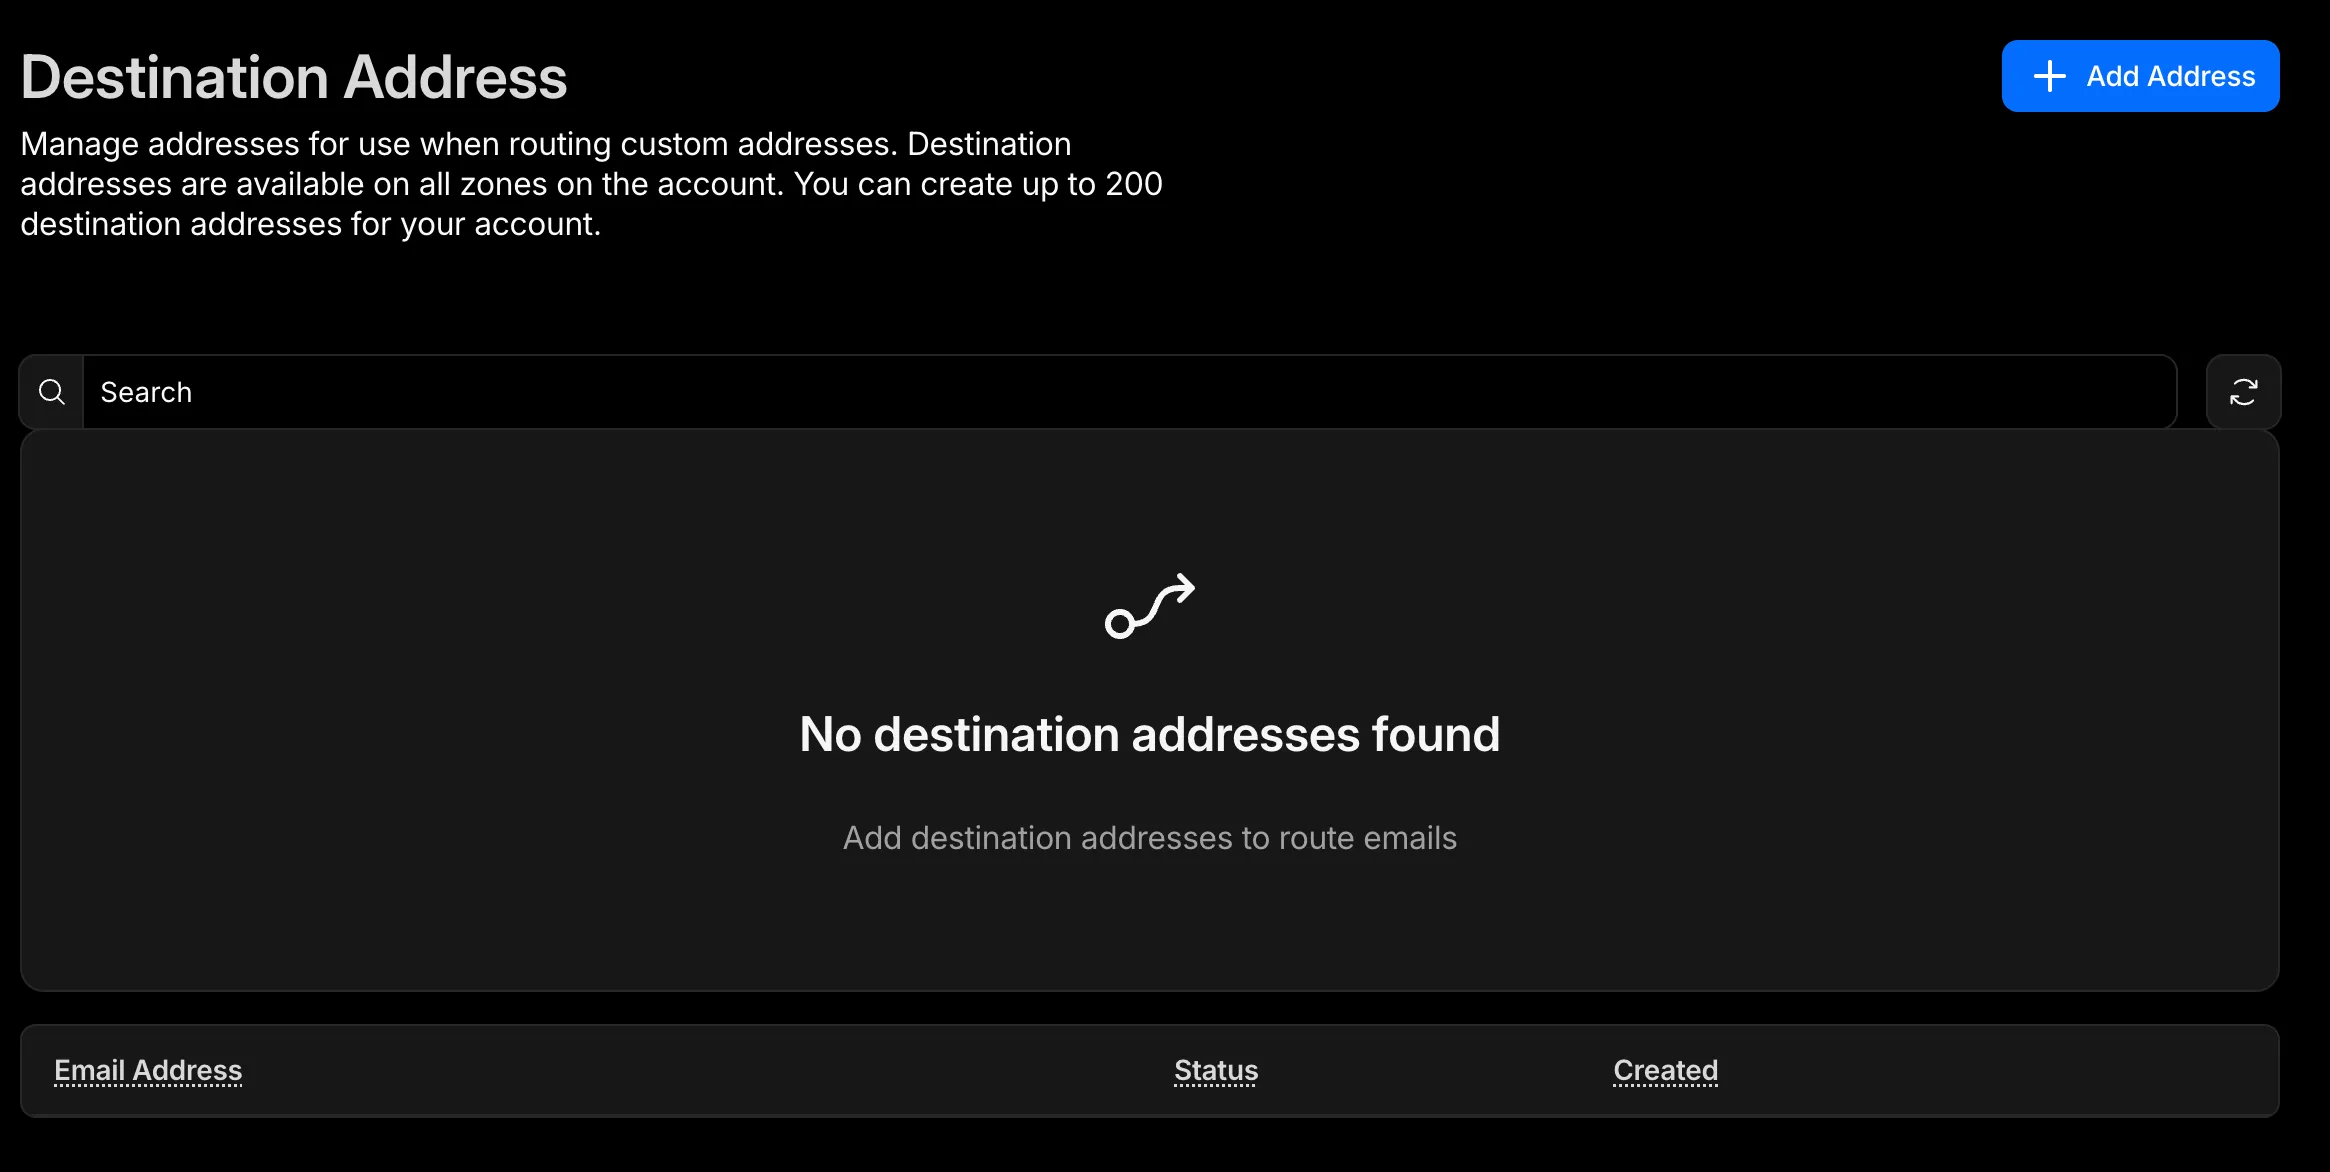
Hit Add Address.
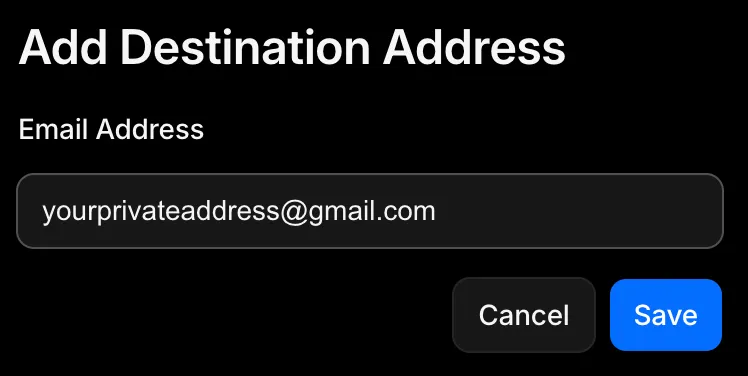
Enter the email to forward mail to and Save.
I got to skip the verification step and my email immediately displayed as Verified. Presumably because I used the same email address that is on my Cloudflare account.
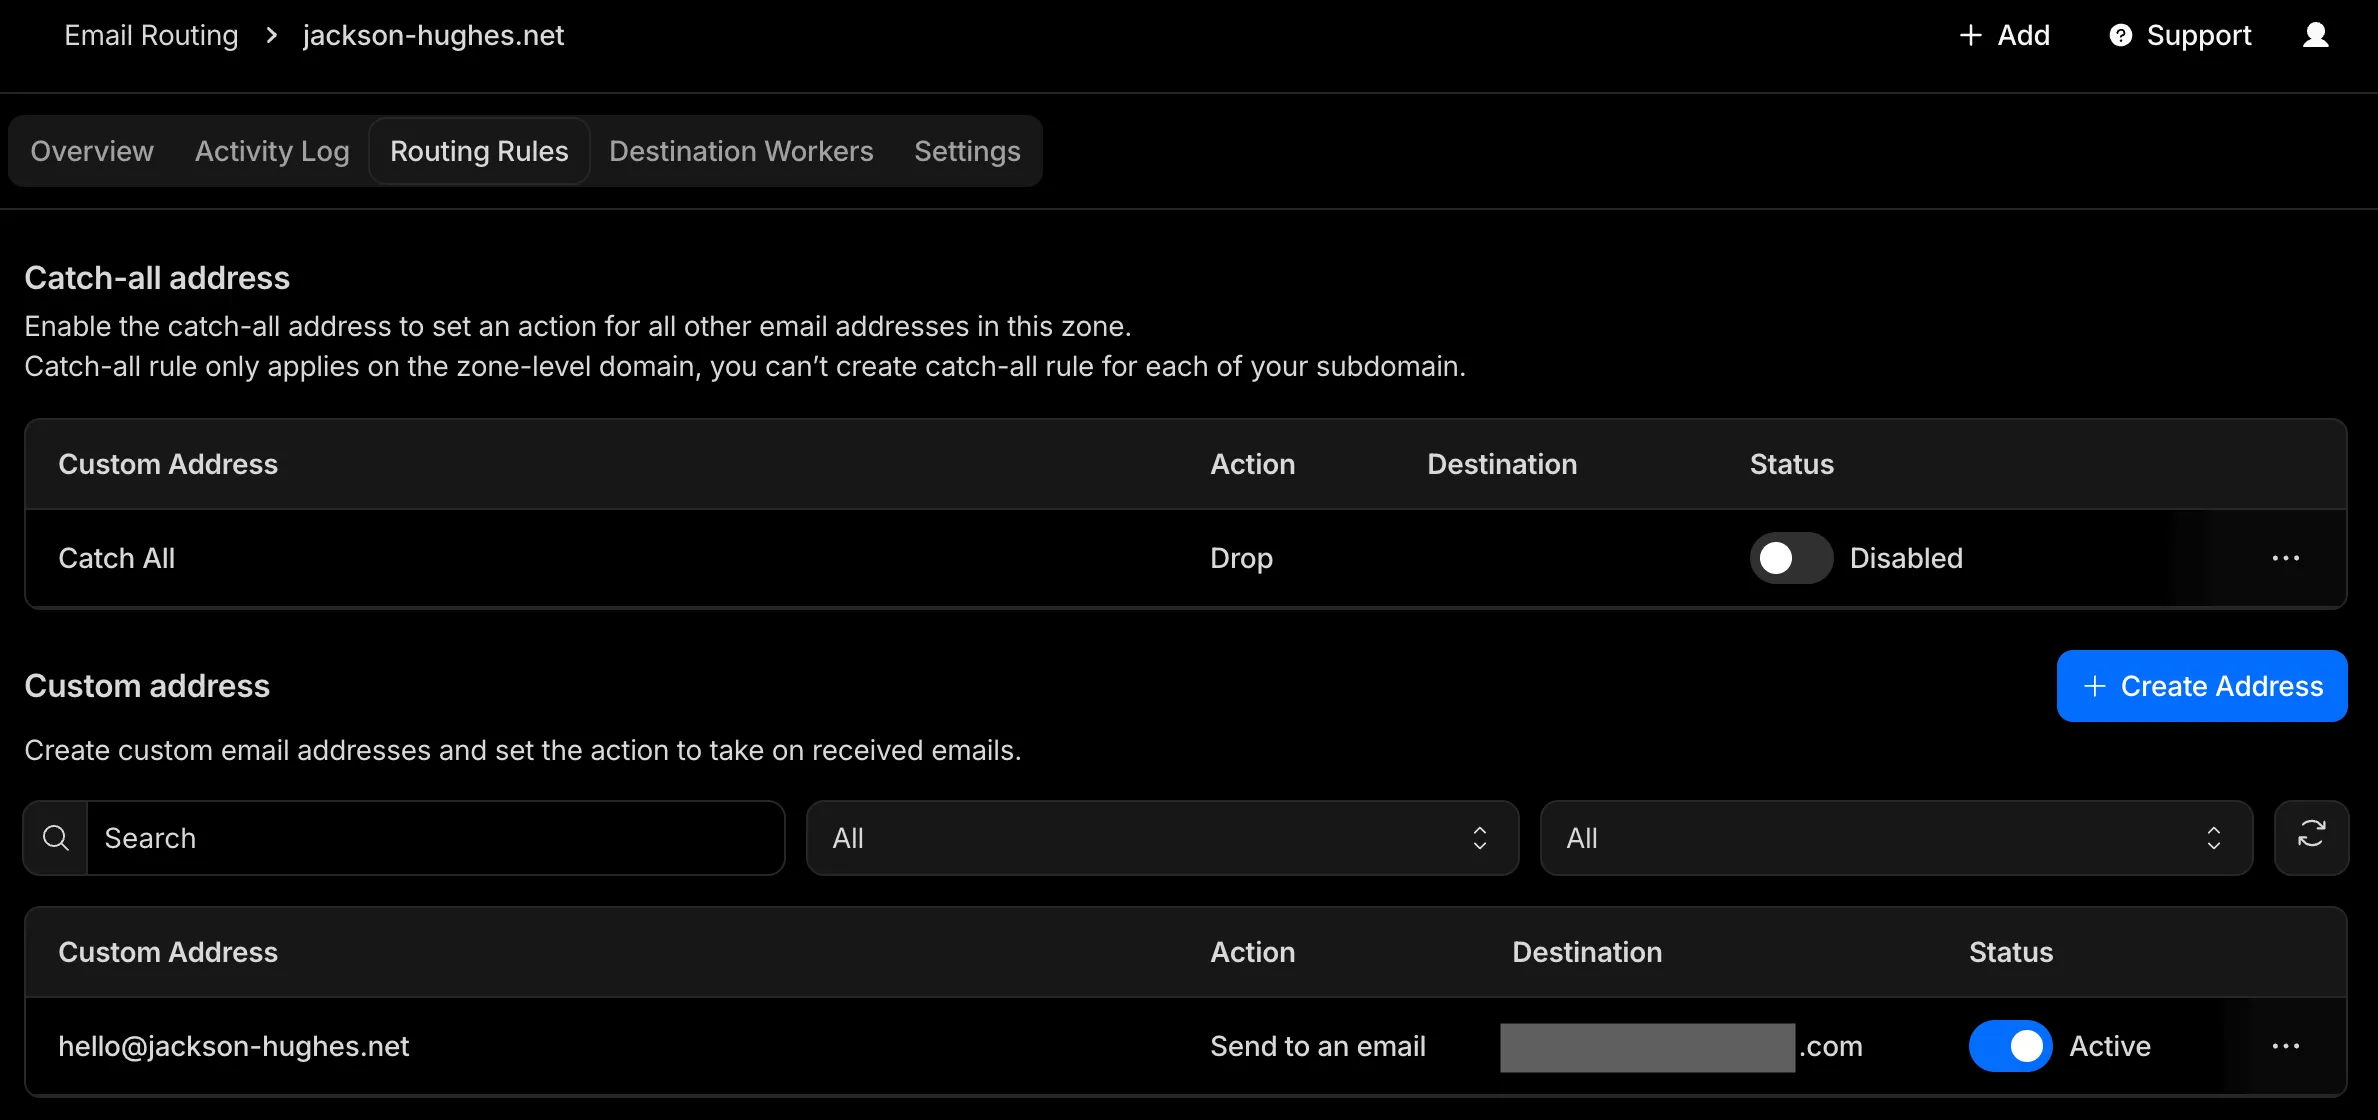
Once that’s done, head into Email Routing, select your domain, and then Routing Rules.
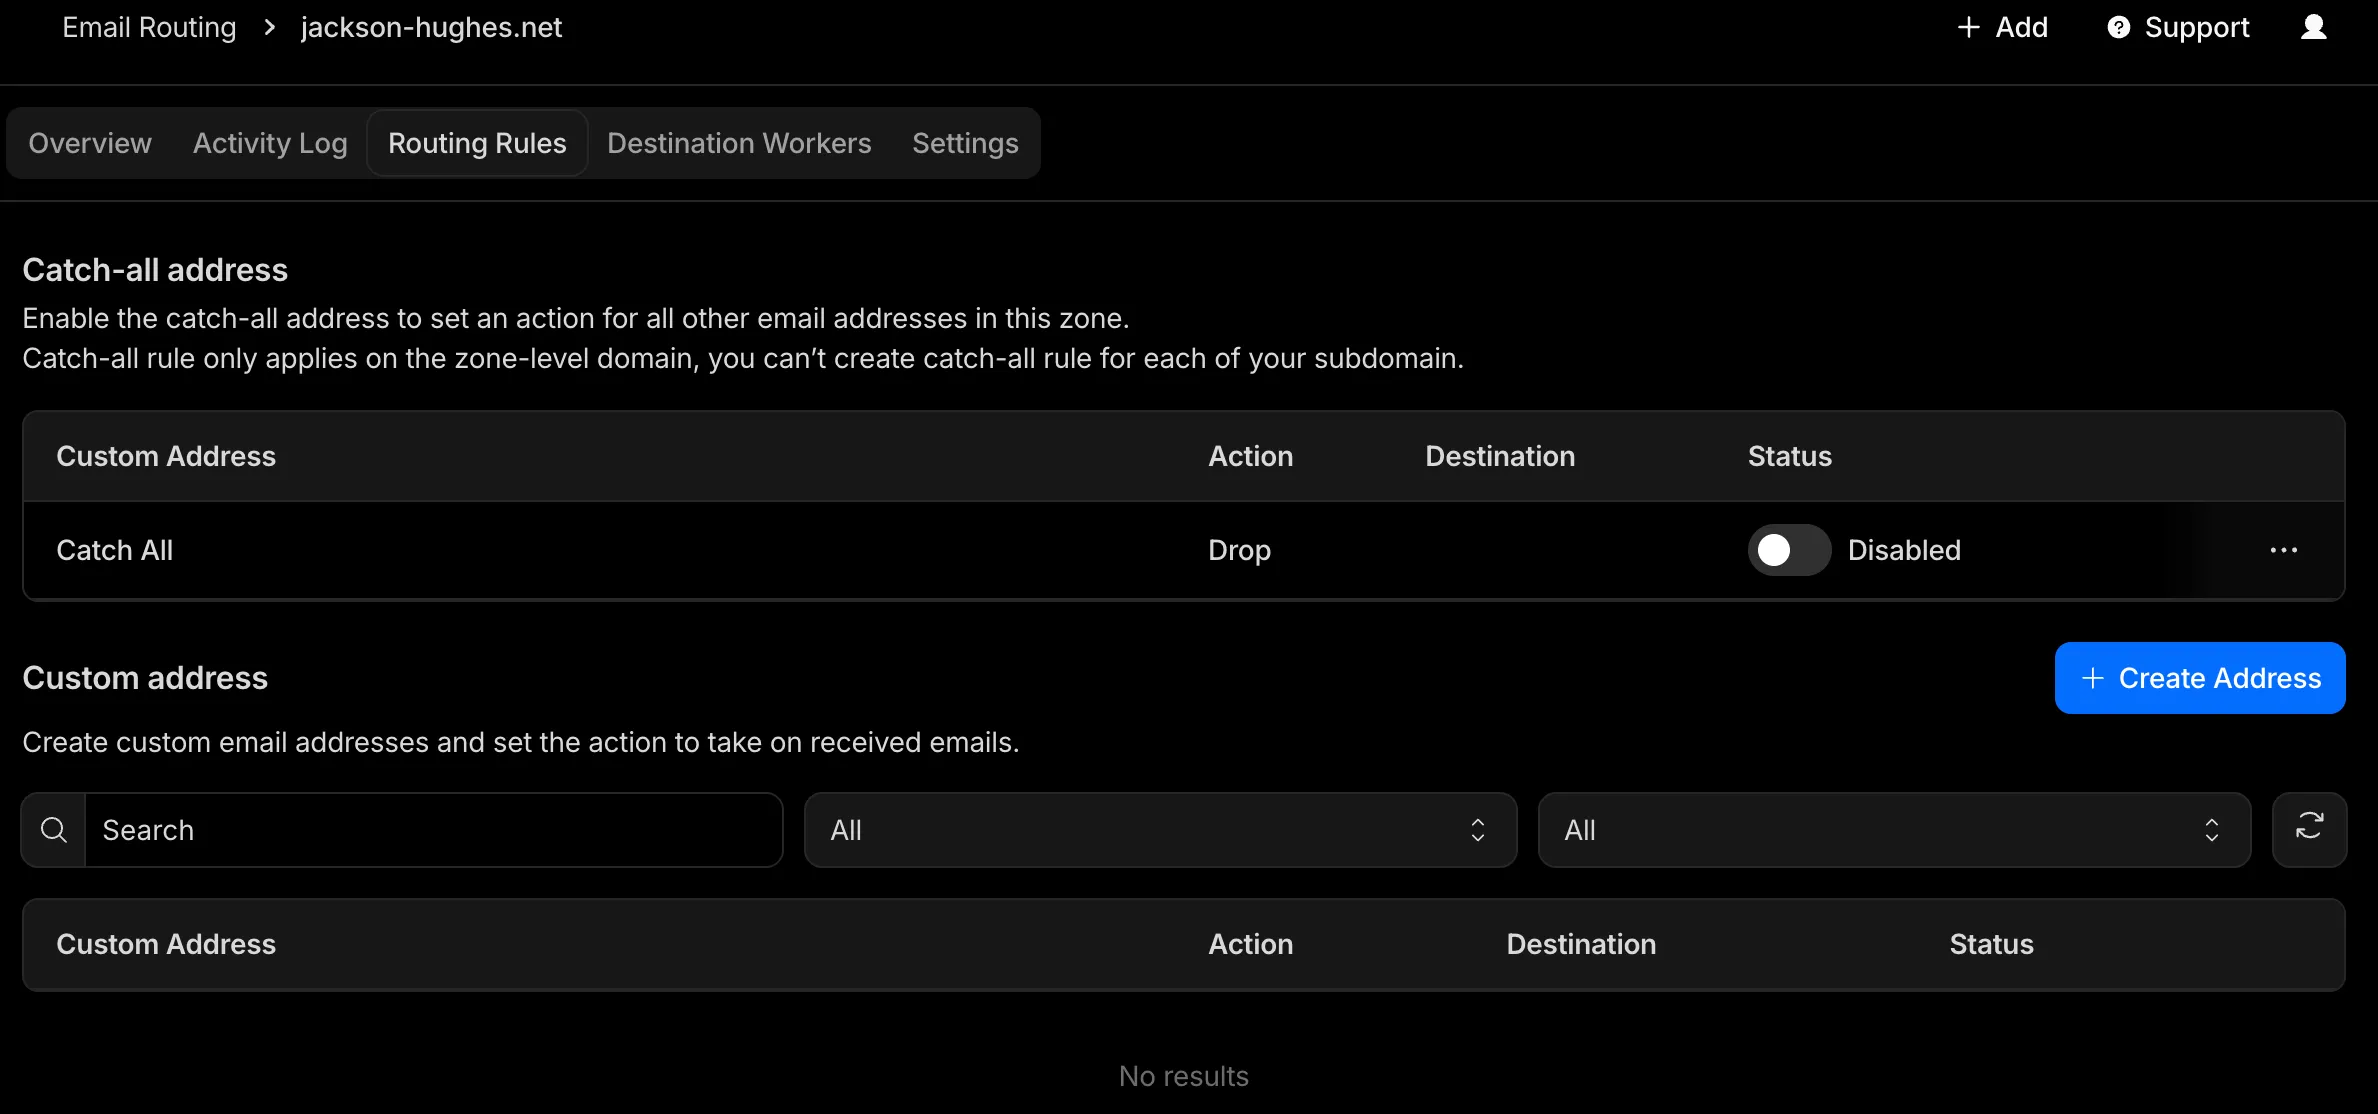
Click the blue Create Address button.

Enter the email address you want to use, set Action to Send to an Email, choose the destination email address you set up earlier from the dropdown menu, and Save.
With any luck, everything should be set up. Let’s give it a whirl.
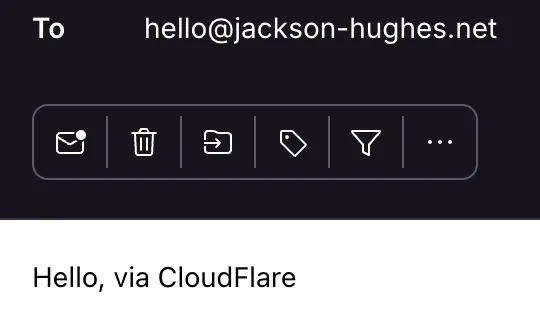
Lovely.